All the Greys Blanket


Okay, so I do crochet AND knit.
But crochet was and will always be my first love.
Plus, I'm the slowest knitter ever, and time is precious!
I will forever choose a Half Double Crochet over a Purl.

Crocheters, there's a place for just us!!
KnitPicks has a new sister, We Crochet!

Check out all things crochet, click HERE

I designed this blanket as a fun collab with We Crochet.


I've had this pattern title on a list of mine for awhile.
Any project I can make with grey yarn...makes me happy :)
All the Greys!
 (next it'll be "all the neutrals" lol)

I used their Wonderfluff yarn in the colourways "Finnley Heather," and "Cobblestone Heather."  It is so fluffy and soft.  It's actually bulky weight but yet lightweight and warm.

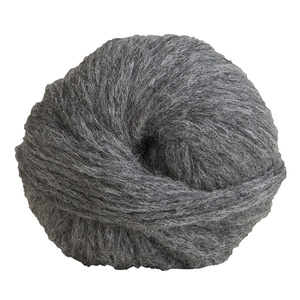
Click HERE to check out all the Wonderfluff colour options.


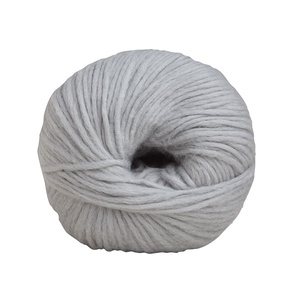
I also used from their Snuggle Puff yarn, "Bunny," which is a heavy worsted weight cotton. It is absolutely huggable and incredibly soft!
Click HERE to check out all the Snuggle Puff colour options.


Notes before you begin:
-the pom poms are an extra touch I added, they are optional.  I just love pom poms on anything!
-you can make this blanket any size you'd like, just increase/decrease your initial chain count
-this can be done with just one colour or many colours, the stitches change every 12 rows
-I made a baby size blanket


Here is the "All the Greys Blanket" :


OTH Crochet Nook Pattern: All The Greys Blanket

Materials:

Hook size: 6.00mm
I used: Wonderfluff (Colour B: Finnley Heather x 2, Border/Colour C: Cobblestone Heather x 1 ) 
and Snuggle Puff (Colour A: Bunny x 2)

Legend:
CH - Chain
SC - Single Crochet
HDC - Half Double Crochet
SL ST - Slip Stich


With Colour A
Ch 61
Row 1: *HDC in the 2nd ch from the hook, SC in the next. *Repeat until the end. Turn.
Row 2: Ch. 1, *HDC, SC. *Repeat until end. Turn.
Row 3 - 12: Repeat Row 2

With Colour B
Row 13: HDC in every stitch. Ch. 1. Turn.
Row 14- 24: Repeat Row 13

With Colour A
Row 25 - 37: Ch. 1, *HDC, SC. *Repeat until end. Turn.

With Colour B
Row 38 - 50: HDC in every stitch. Ch. 1. Turn.

With Colour A
Row 51 - 63: *Ch. 1, *HDC, SC. *Repeat until end. Turn.

With Colour B
Row 64 - 76: HDC in every stitch. Ch. 1. Turn.

SL ST twice.
Fasten off.

Border:
Attach Colour C.
SC around entire blanket once.
Make sure each corner has 3SC.
SL ST.
Fasten off.

Optional:
Make 4 pom poms and attach to each corner.


That's it!
Can't wait to see what shades of grey you choose.

Tag me so I don't miss it!

Use: #OTHAlltheGreys


Share:

Put a Tag on it Gift Boxes


I’ve been having so much fun working on quick holiday projects this month.
Thank you for all the love on the “Fa La La” yarn garland!

Here is another perfect holiday project that won’t take you more than an hour....
an uninterrupted hour though ;)

Here are my “Put a tag on it Crochet Gift Boxes”


These adorable crochet boxes are so easy to make, and work 
up very quickly with Bernat Blanket yarn.

I love how chunky and soft they are!

And definitely perfect for beginners.

They are made up of 6 squares, seamed together to make a cube, stuffed and 
tied with a pretty ribbon!

So easy!


Before we start, this pattern is part of 
“24 Days of Quickies with Marly Bird & Friends!”
There are 24 quick knit and crochet projects released this month.
All FREE patterns!!!


Click HERE to see all the FREE
patterns that have already been released, and check it daily to find a new pattern everyday until December 24th!


Now let’s get making!


OTH Crochet Nook Pattern: Put a Tag on it Gift Boxes

Materials:

Hook size: 10.00mm
I used: Bernat Blanket Stripes (I separated the colours)

Legend:

CH - Chain
SC - Single Crochet
SL ST - Slip Stich

SMALL SIZE:


*Make 6
Ch 11
Row 1: SC in the 2nd ch from the hook, SC until the end. Turn. (10)
Row 2: Ch. 1, SC until end. Turn. (10)
Row 3 - 10: Repeat Row 2
SL ST, Fasten off.

LARGE SIZE:

*Make 6
Ch 15
Row 1: SC in the 2nd ch from the hook, SC until the end. Turn. (14)
Row 2: Ch. 1, SC until end. Turn. (14)
Row 3 - 12: Repeat Row 2
SL ST, Fasten off.


With your 6 identical squares, seam them together to make a cube. 


Leave one side open.
Turn inside out.
Add stuffing and sl st closed.


That's it!

I'd love to see your "Put a Tag on it Gift Boxes"


Share:

Fa La La Garland


Oh my garland!


I found this adorable Fa La La garland at my local Canadian Tire.
I loved it so much, but I wasn't a fan of the gold.

My solution for everything is WRAP IT IN YARN!

I decided right then to wrap the letters in chunky blanket yarn.

And bonus: the pom poms were already added to it!

Making 6 small pom poms and grabbing 3D styrofoam letters from a craft store would be easy to create yourself as well.
Cut some twine and attach them all to create your own!

*this blog post is not sponsored by Canadian Tire, but if you'd like to get a Fa La La garland for yourself, click HERE

It's only $14.99! (CAD)

Image result for fa la la garland canadian tire"

I took a ton of pictures on how I wrapped the yarn around the letters.
The "A's" are definitely tricky.

But I didn't use much yarn and it was completed pretty quickly.

Yarn: Bernat Blanket Yarn in VINTAGE WHITE


Here is how the letters look up close:


I started wrapping the A from the bottom up.
I'd finish one side all the way to the top, attach and cut off.
Then attach a new piece of yarn to do the other side.


I double wrapped the "F" and the "L's" so that I could cover the sides of each letter.


Here is a close up of the pins I used to hold the yarn in place.
I used as many as I needed, securing and wrapping as I went a long.
They go in very easily into styrofoam obviously - which made it so much faster!


The A's took the longest, but really only added an extra 10 minutes or so....this project is a quick one!


I love how it turned out!
The vintage white matches my holiday decor, and I love the bright coloured poms!


If you make your own, I'd love to see it!


Share:

Maker Gift Guide


The holidays are here and believe it or not....all makers don't want JUST yarn.


Well, we wouldn't ever turn down yarn...BUT there are so many fun and meaningful maker gifts out there.


Here are 5 gifts I would definitely love under my tree.

And I've also included a gift that gives back - which is the only maker gift we all should be giving this season!


Krista is the founder of YARN MAMAS.  She is rockstar Mom that not only has her own apparel company but also designs patterns for her blog Rescued Paw Designs.

Look how adorable all of these sweaters are!


To check out all of the Maker apparel, click HERE

And make sure to the promo code OTH15 at checkout 
to receive 15% off your purchase until Dec 31, 2019


I love maker gadgets that make making so much easier! (make make make...lol)
There are so many handy tools to help speed up your projects.
Here are 2 awesome tools to stuff that stocking with:

For knitters or the crochet curious, here is a kit you absolutely need:

Learn crochet basics for both left and right hand use with full color illustrations! 
This kit contains 5 crochet hooks, 2 finishing needles, Knit Chek, folding scissors, 10 assorted stitch markers and comes with a reusable zip-top clear plastic pouch. 
Plus, there are 15 project instructions to get you started.

Click HERE to check it out the LEARN TO CROCHET KIT on Yarnspirations.com

Finish your projects in half the time by making multiple pompoms at once! 
The Red Heart Pom & Tassel Maker is so easy to use!


Click HERE to check it out the POM AND TASSEL MAKER on Yarnspirations.com

Check out this video on how to use the Pom and Tassel Maker, by the lovely Marly Bird, click HERE to watch!


The maker behind Repeat Crafter Me is the lovely Sarah Zimmerman.  Sarah is one of those makers  that really pushed me to design and write patterns.  I met her only once and she truly inspired me during our short chat.

Click HERE to check our her blog full of a ton of  FREE patterns.

She recently wrote her 2nd book "Crochet Cute Critters," full of 26 easy amigurumi patterns!
Everything Sarah publishes is perfect for beginners.


Click HERE to grab your copy on Amazon!

AND - if you're one of the lucky ones to read this far in my blog post...first, thank you! 

And second, you could win a copy of Sarah's Book: Crochet Cute Critters

Follow the steps in my Instagram post, click HERE


I love supporting locally made products.
This yarn bowl is carefully handcrafted by Madeleine Coomey in Vancouver, B.C.
Not only are these yarn bowls gorgeous, but it's perfect for keeping your yarn in place while you work.

Click HERE to see all the designs and colours available.


Image 1


The best part of the holidays has always been giving back.
I am lucky to have been able to give back in a big way through my day job.
Last year we filled our TV studio with single parents.  They were overwhelmed with gifts and were so grateful that their holidays were going to be a lot less stressful that year.


Yarn Canada has teamed up with Bernat Yarn and Patons Yarn to giveaway $2000 worth of yarn to use towards good causes.

The prizes are as follows:

1 x $500 of yarn to a Canadian group who knits or crochets for a good cause
1 x $500 of yarn to an American group who knits or crochets for a good cause
10 x $100 of yarn to Canadian or American individuals or groups who knit or crochet for a good cause


All you need to do to apply is fill out the form and tell their story, click HERE to give back!


If you've made it this far, I hope I've checked a few lucky people off your list!
Happy Holidays!

********
Copyright line: Excerpt from Crochet Cute Critters: 26 Easy Amigurumi Patterns, by Sarah Zimmerman, published by Rockridge Press. Copyright © 2019 by Callisto Media. All rights reserved.
Share:
© OTH Crochet Nook | All rights reserved.
Blog Layout Created by pipdig